eslapion wrote: ↑Sun Jun 16, 2019 3:47 am Hey thanks for the comments!Why exactly did you need to use a software to concatenate the files ? http://www.vic20.de/html/eprom_pla_8296_und_c64.htmlbanman wrote: ↑Sun Jun 16, 2019 3:42 am These cartridges and the ROM adapters holds 8 x 8kB ROM images. That is to say a 64kB EPROM . One needs to concatenate the 8 x 8kB files into 1 x 64kB file image to then be burnt on to the EPROM.
At that point I had absolutely no idea what that meant or how do it.
...
Oh ... I finally worked out how to concatenate multiple 8kB files - use HJSplit for Windows . It makes life very easy.....and be sure to print off Sukko Perra's ROM table for jumper settings for easy manipulation of the multi cartridge. Also make sure that each game image is exactly 8kB in size when joining.
Hi eslapion,
My pleasure,
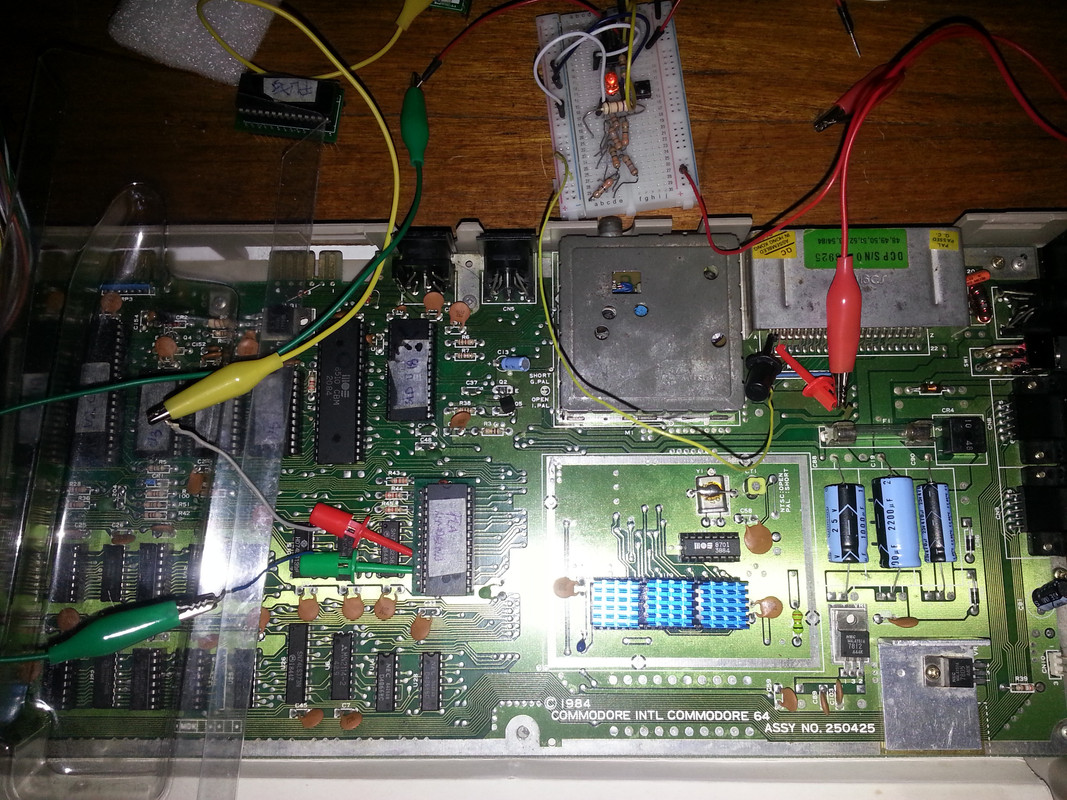
Thank you for all your patience in helping me get a working test circuit to get a clearer picture of what I was observing in these PROM based PLA's .
My apologies on the confusion on these statements.
I was referring to the original game cartridges I had set out to create. Being a complete newbie I couldn't get my head around idea of putting 8 of the 8kB games on to the single 64kB EPROM. It sounds silly I know. It took me a while to catch on.
Actually this is the site where I got the PLA.bin files to create my EPROM based PLA .
http://www.vic20.de/html/eprom_pla_8296_und_c64.html
This site has a circuit wiring diagram one can use .
The whole process of EPROM based PLA construction was very painless.
I got boards made up from this site:
https://oshpark.com/shared_projects/mdayhhyk
You can download the gerbers and take them to any PCB manufacturer you prefer. I also used PCBWay and found their boards a little better quality and cheaper.
By the way I don't think the timing delay capacitor is really required for the knockoff (fake) ST M27C512-90B6
I Burned a PLA.BIN with a TL866 minipro from here:
http://vic20.de/html/eprom_pla_8296_und_c64.html
That was basically it..... Just make sure that the chip's location dimples are inserted the correct way on the adapter board and the whole device with the dimple is pointing upwards on the C64 main board. That is towards the C64's RF unit.
I suggest using a 28pin socket and precision turned pins when making up the adapter board. The precision turned pins help preserve the C64's board and makes insertion easier.
I was thinking could a similar solution be used on a C16/ plus4 ?